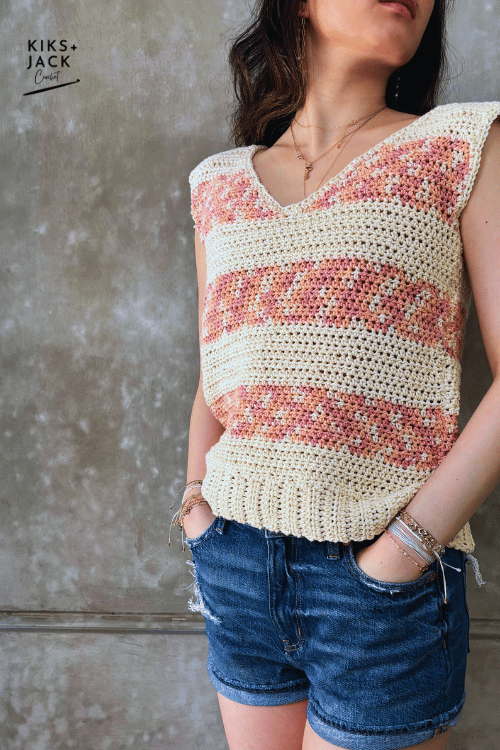
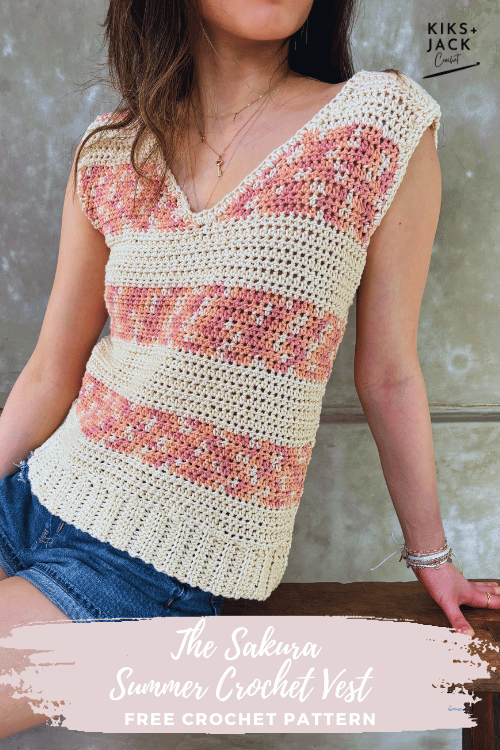
The Sakura Summer Cotton Crochet Vest is a free and easy crochet pattern that is made to measure, size inclusive and beginner friendly.
Vests are amazing because they are so versatile. When you need something casual but don’t feel like wearing a basic T-shirt, throw on a vest. Looking for something more formal? Team a vest with a crisp white shirt and a nice pair of pants, or wear it with a little skirt. Vests can be worn all year round and the texture and warmth is just dependant on the type of yarn you use.
We are trying to keep all our crochet patterns free for everyone, when you access them online. We meet the costs of running this website through coffee donations at https://ko-fi.com/kiksandjackcrochet and ad revenue. When you buy us a cup of coffee, you buy us a cup of motivation. Thank you for keeping us motivated and inspired every day to keep designing free crochet patterns for you.
Initially we designed and crocheted this pattern using a warmer thicker yarn. It turned out great, was super soft but felt too warm for summer – probably something that will get posted up in fall. Switching up the yarn to a cotton blend and crocheting like crazy for 2 days produced the Sakura Summer Cotton Crochet Vest! It turned out great – a little vest that has a little more structure than a tank top.
This vest is so simple and easy to crochet. If you know how to do the half double crochet – that’s pretty much all there is to it! You will be able to make this and it will work up fast!
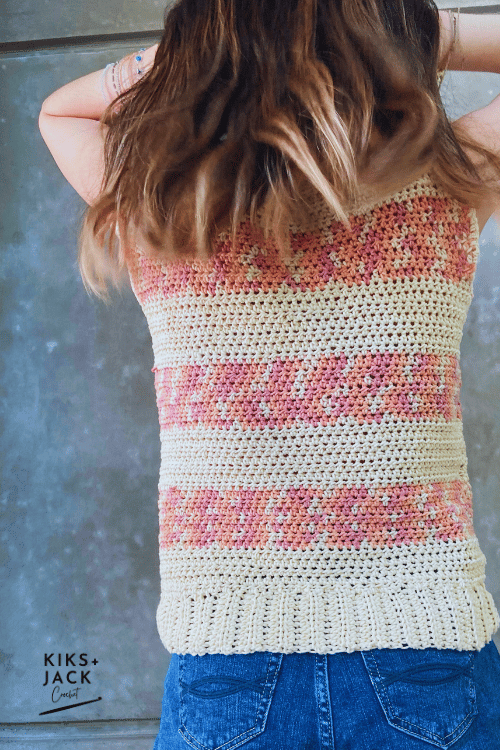
We used a beautiful cotton blend yarn by Yarnspirations called Caron Cotton Cakes. Caron Cakes Yarn is amazing. The colour palettes are awesome and it takes the thinking out of matching hues. You can use Caron Cakes in different ways. Sometimes you may want to crochet a Caron Cake from start to finish. You can go with the flow and whenever there is a colour change – take it and embrace it! Doing it this way – don’t get fussed if your garment isn’t fully symmetrical or if stripes don’t line up perfectly. Using a Caron Cake this way, its great to see the process of seeing where the skein takes you and just embrace the end result.
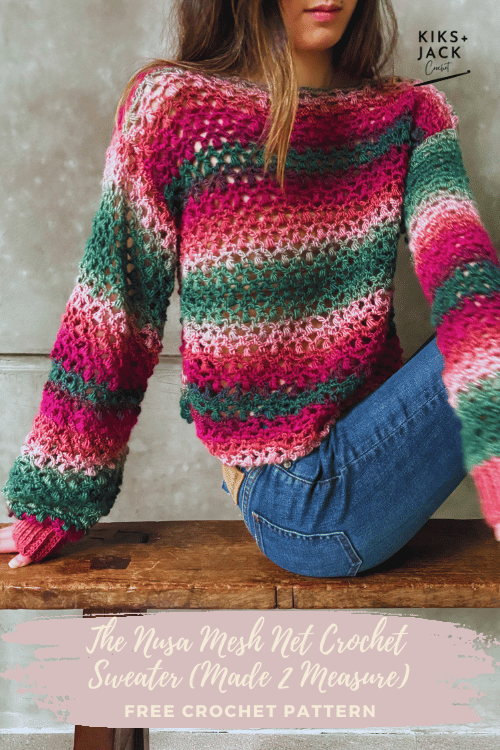
Other times, you can pick the Caron Cake apart and use the beautiful colours in a way that is very calculated and intentional. You may even discard colours from the skein that you don’t feel like using. We did this with the Nusa Mesh Net Crochet Sweater. We pulled all the colours apart, switched up colours depending on my design and did not use the white.
For the Sakura Summer Cotton Crochet Vest we wanted large stripes and used the Caron Cotton Cakes Apricot Sorbet. The cotton was pulled from both ends and we used white or apricot as and when needed. The Caron Cotton Cakes yarn is a weight 4/medium/worsted cotton blend of 60% cotton and 40% acrylic. If you have trouble finding this yarn, any cotton blend weight 4 yarn would work for this pattern.
SAKURA COTTON CROCHET VEST DESCRIPTION
The Sakura Summer Cotton Crochet Vest is a sleeveless top with a simple stitch of half double crochets and simple edging. It features a V neck design and large stripes. The top is designed to hit at the hips, however it is easy to create a longer or shorter top. This is a free and easy crochet pattern.
CROCHET MEASUREMENT & SIZES
The pattern instructions are made to measure, based on your required measurements.
Kiks + Jack Crochet will always try to write patterns that are “made to measure” (versus graded sized patterns) so that crocheters can get the wonderful benefits of making a garment that fits perfectly. However we do appreciate taking measurements can be inconvenient for some and have also provided standard sizing for those who wish to use it.
To use this pattern you will need the following measurements and you should write them down for easy reference:
Chest/Bust: Measure around the fullest part of your chest/bust. Do not draw the tape too tightly.
Finished length: Measure from your waistline (or where you would like the top to end) up to the top of your shoulder. We wanted our top to hit a little lower than the waistline.
Length to armpit: Measure from your waistline (or where you would like the top to end) up to bottom of your armpit
Cross Back: Measure from shoulder to shoulder (we will use this for armhole shaping)
If you would like to use standard sizing for the chest/bust – then for XS (S, M , L, XL, 2XL, 3XL, 4XL, 5XL) use approximately 28-30 (32-34, 36-38, 40-42, 44-46, 48-50, 52-54, 56-58, 60-62) inches or 71-76 (81-86, 91-96, 102-107, 112-117, 122-127, 132-137, 142-147, 152-158) centimetres.
Note: Designed as a classic fit with some positive ease.
CROCHET GAUGE
Using a 5mm hook (US 8), approximately 12 stitches and 12 rows of the stitch pattern (half double crochet) in 4″ x 4″ (10 cm x 10 cm).
MATERIALS FOR COTTON CROCHET VEST
This section contains product affiliate links. We may receive a small commission (at no extra cost to you) if you make a purchase after clicking on one of these links.
We promise to only recommend products that we love and that we use.
Yarn brand: Caron Cotton Cakes by Yarnspirations. Weight 4/Medium/Worsted. 227g per skein and 481 yards (or 440 metres).
This pattern is made to measure, however based on yarn standards total skeins used is approximately 2 skeins for an XS – 2XL and 3 skeins for 3XL – 5XL . Color used is Apricot Sorbet.
5 mm crochet hook (US size 8). We use many different crochet hooks and some of them can get quite pricey – but if you are a beginner and looking for some great budget friendly ergonomic crochet hooks try these from Amazon. It comes in a set and the grip and shape is amazing for beginner crocheters. We love these and recommend them to all our beginner crochet friends.
Measuring Tape. We use a super budget friendly measuring tape. Make sure it has cm and inches (not all patterns are written with both). We are always crocheting on the go so we like our tapes small and compact and we put one in our design area, one in our bag and one in our car. Retractable works best! We use these super cheap mini measuring tapes from Amazon.
Stitch Markers. We use these locking crochet stitch markers from Amazon and these stitch markers that do not lock. They are cheap and colourful.
Blocking Pins. You should buy more pins than you think you need. If you are going to take the time to block don’t skimp on the pins. We like T shaped stainless steel pins that don’t rust when they get wet. We love these blocking T pins from Amazon and the tin means the pins don’t fall out on the floor.
Yarn Needle. Buy blunt needles with large eyes for yarn. We use these Yarn Needles because we like the convenient bottle, they are budget friendly and we get lots of them!
Scissors. We love these thread snippers because they are cheap, we get two of them AND they come with a case (some don’t). Don’t carry these without the case! After you use thread snippers you won’t want to snip with scissors.
CROCHET STITCHES & ABBREVIATIONS
ch = chain (With one loop on your hook, yarn over and pull through the loop)
sc = single crochet (Insert hook into desired stitch. Yarn over and pull through the stitch. You now have two loops on your hook. Yarn over and pull through all two loops)
hdc = half double crochet (Yarn over and insert hook into desired stitch. Yarn over and pull through the stitch. You now have three loops on your hook. Yarn over and pull through all three loops)
hdc2tog = half double crochet two stitches together
tch = turning chain
sl st = slip stitch
st = stitch
sk = skip stitch
* = repeat the instructions following the * as directed
Note unless stated otherwise turning chains do not count as a stitch if there are 1 or 2 chains and the turning chain does count as a stitch if there are 3 or 4 chains.
SUMMARY OF CONSTRUCTION for The Sakura Summer Cotton Crochet Vest
The Sakura Summer Cotton Crochet Vest is made by first crocheting a front panel and an identical back panel. We will start by crocheting the panel bottom up. For the back panel, we will shape for the arm openings, and for the front panel we will shape for the arm openings and the V neck at the same time. We will seam the two panels together to complete the top.
The Sakura Summer Cotton Crochet Vest is a free and easy crochet pattern available as a size inclusive made to measure pattern. It is beginner friendly and the Kiks + Jack Crochet version uses weight 4/worsted yarn. The stitch pattern is simple using primarily half double crochets.
PERMISSION & COPYRIGHT
You may not publish or share any pattern on this website www.kiksandjackcrochet as your own including this pattern The Sakura Summer Cotton Crochet Vest. Except as permitted by the copyright law applicable to you, you may not reproduce or communicate any of the content on this website, including files downloadable from this website, without the permission of the copyright owner, Kiks + Jack Crochet.
You may not use any Kiks and Jack Crochet photo as your own photo.
You may crochet items to sell using The Sakura Summer Cotton Crochet Vest pattern upon permission by email at [email protected]. Please link back to this post in exchange.
CROCHET PATTERN INSTRUCTIONS for The Sakura Summer Cotton Crochet Vest
Crochet the Back Panel – Ribbing
Using colour 1 (eg. cream).
ch 12 (12, 12, 12, 12)
The height of our sleeve ribbing is approximately 2 inches. Based on our gauge this is approximately 12 chains. However you can adjust the number of chains if you want to change the height of the ribbing or you are using a yarn with a different gauge.
Row 1: 1hdc in 3rd ch from hook, hdc in each ch across. Turn.
Row 2: ch2, hdc BLO in each st across. Turn
Row 3: repeat row 2
Continue repeating row 2 until the length of your ribbing is equal to half your “Chest/Bust measurement” + 1 inch.
Example: Our chest/bust measurement = 32 inches around. We repeat row 2 until the ribbing measures 32/2 + 1 = 17 inches long. Based on our yarn and guage this was 36 rows.
It’s a great time to check if you are completely happy with the width of the sweater before you crochet any further. Place the ribbing up at your waist or top of your hips to see if the width (length of ribbing) is right for you. If you would like it to be wider, crochet a few more rows. If you would like the ribbing to be tighter, then you can frog (unravel) a few rows.
Do not fasten off. Turn your ribbing so that you will now work down the long side of the ribbing.
Crochet the Main back panel – Lower
Continue using colour 1 (eg. cream)
Calculate the number of rows in your ribbing x 1.5.
Example: we crocheted 36 rows, so we will crochet 36 x 1.5 = 54 stitches across the ribbing.
Row 1: ch1, sc in the first st, sc across the ribbing the number of stitches calculated above. Turn
Example: we crocheted 54 single crochets across our ribbing above. To crochet evenly you can place stitch markers across the ribbing at the 1/4, 1/2 and 3/4 marks. Then divide the number of stitches by 4 to give you an approximate number of stitches you need to crochet in each quarter.
Row 2: ch2, hdc into the 1st st, hdc across until the end. Turn.
Row 3 – 4: repeat row 2
Change to colour 2 (eg. apricot sorbet)
Row 5 – 12: repeat row 2
Change to colour 1 (eg. cream)
Row 13 – 20: repeat row 2
Continue to repeat row 2 and alternate colours every 7 rows. Stop when the total length (including the ribbing) reaches your “Length to Armpit measurement” minus 1 inch.
Example: Our length to armpit measurement is 14 inches (we wanted a top that sat slightly below the waistline). We crocheted row 2 (alternating colours every 7 rows) until the total length including the ribbing equalled 13 inches.
Don’t fasten off.
Crochet the Main back panel – Upper/Armholes
Remember to alternate your colours after every 7 rows.
We will first shape for the armholes by slip stitching in from the edge. We need to calculate the number of stitches we will drop to shape the armholes as follows:
“Chest Bust Measurement”/2 – “Cross Back measurement” = total stitches dropped for armhole shaping
Example: 32 inches/2 – 14 inches = 2 inches. We need to drop 1 inch from the left side and 1 inch from the right side. Based on our guage 1 inch = approximately 3 stitches, so we need to drop approximately 2-3 stitches on each side.
Place a stitch marker at these two points.
In our example we would place a stitch marker on the third stitch (1 inch) in from the left side and place a stitch marker on the third stitch (1 inch) in from the right side.
Row 1: sl st from the edge to the first stitch marker. ch2, hdc into the st with the stitch marker, hdc across until you reach the second stitch marker. Stop at this point and turn.
Row 2: ch 2, hdc into the 1st st, hdc across until the end of the row. Turn
Row 3: repeat row 2 until the total length of your top reaches your “Finished Length measurement”. Remember to alternate your colours after every 7 rows.
Example: Our finished length measurement is 20 inches and we repeat row 2 until the total length of our top including the ribbing equals 20 inches.
Fasten off.
Crochet the Main Front Panel – Lower
Repeat all the instructions under Main Back Panel – Lower.
Remember to alternate your colours after every 7 rows.
Crochet the Main Front Panel – Upper/Armholes and V Neck
We will now shape for the armholes and V neck. Place a stitch marker at the midway point for the V neck. Use a measuring tape to calculate this. Also place a stitch marker to shape for the left armhole.
In our example we would place a stitch marker on the third stitch in from the left side and place a stitch marker in the centre of our top.
Remember to alternate your colours after every 7 rows.
Row 1: sl st from the left edge up to the first stitch marker. ch2, hdc into the st with stitch marker, hdc across until you reach the second last stitch from the centre stitch marker, hdc2tog the last 2 stitches. Turn
Row 2: ch2, hdc into each st across the row. Turn
Row 3: ch2, hdc into each st across the row until you reach the second last stitch from the centre, hdc2tog the last 2 st. Turn
Row 4: repeat row 2
Row 5: repeat row 3
Repeat Row 2 and Row 3 in that order until you reach the V neckline depth and shoulder strap width that works for you. In our example, we stopped when there were 11 stitches left in the row (this will depend on your gauge however and desired measurements).
After you have reached the desired v neckline depth and strap width, stop crocheting row 3 (the decreasing row). Instead repeat row 2 until your top reaches your “Finished Length measurement” and matches the length of your back panel.
Fasten off.
Repeat all the instructions on the opposite side for the right V neck.
Fasten off.
Assembling The Sakura Summer Cotton Crochet Vest
Kiks + Jack Crochet highly recommends blocking all your panels before assembly. We understand you have finished and are eager to seam this all together! However blocking your panels will set your panels to the shape and size you want and give it a polished look.
Place the two panels together with the right side facing together and the wrong side facing outwards.
Using a yarn needle and matching yarn, seam the two shoulder straps together.
Using a yarn needle and matching yarn, seam together the left side and the right side from the bottom edge up to the bottom of the armholes.
Crochet around the Neckline
We will now crochet around the neckline and sleeve line. Turn the vest right side out.
Attach yarn at the top of the shoulder on the left side of the vest.
ch1, sc around the left armhole. The key is to crochet the sc stitches evenly. If it starts to bunch in, you are placing the sc too close together.
Repeat on the right armhole.
Attach yarn at the top of the V neck on the left side. ch1, sc around the V neckline. Crochet the sc stitches evenly. Similarly, if it starts to bunch in, you are crocheting the sc too close together.
(If you would like to do another row of single crochets around the neckline and sleeve line for a slightly wider edge you can do so).
Fasten off.
Finish & Celebrate The Sakura Summer Cotton Crochet Vest
Weave in all your ends.
We are trying to keep all our crochet patterns free for everyone, when you access them online. We meet the costs of running this website through coffee donations at https://ko-fi.com/kiksandjackcrochet and ad revenue. When you buy us a cup of coffee, you buy us a cup of motivation. Thank you for keeping us motivated and inspired every day to keep designing free crochet patterns for you.
Congratulations you have finished The Sakura Summer Cotton Crochet Vest.
We hope you enjoyed this free and easy crochet pattern.
It would be amazing to see a photo of your completed work on instagram. Tag us @kiksandjackcrochet.


Comments are closed.